Intro to Alternate Engineering
Saturday, April 15, 2023

by Chris Webb from SDC Rhythm XP
Why we use them
We use alternate engineering when it makes a quicker/short transition between points and by doing this, we can get more points during a dive. Here we have a few general guidelines for using alternate randoms or blocks.
Let’s talk about the nomenclature real quick. The naming convention for short 19 is written like this: 19Short or this 19S. Similarly, long B is written like this: BLong or BL. An example dive might be something like this: 4S-B-12.
Train them
There are lots of them and some get used more frequently than others and in general, alternate randoms are going to be easier than the blocks. Like any formation, you have to train them. This is because each alternate formation has its nuance for each position and the team needs to know and be prepared for them. This can be a different sight picture, just an unfamiliar move, or it puts someone in an uncomfortable position. The examples below show each of these respectively. In any case, it has the potential to throw them off because it’s something that is different.
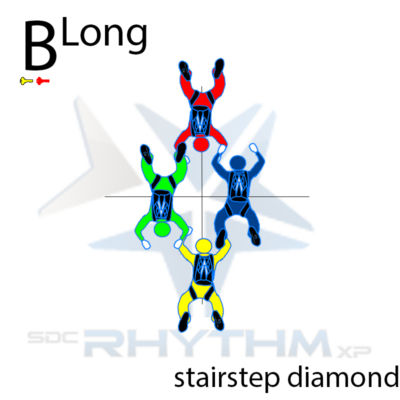
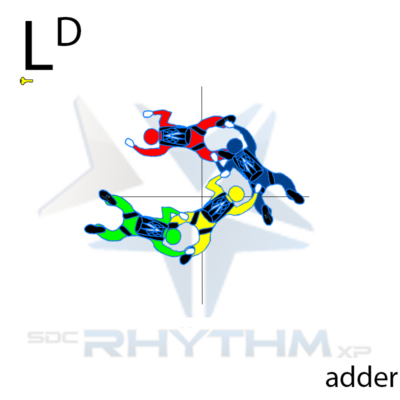
Depending on how much the team is training determines how much time they can realistically spend on these alternate formations. Obviously we want to prioritize the ones that are most likely to be used. Here are the top five we use more often: BL ,LD ,4S ,7P ,19S . All of which can be found here under Alternate Randoms and Blocks: https://rhythmskydiving.com/formation-diagrams/
When to use them and what to keep in mind
Determining when to use them is the first step. In a lot of cases the naming convention will give you an idea as to when you can use them. For example the team could use CL (pronounced the L C) when coming from an L. Sometimes this just takes experience, since you could also use it when coming from an J or an N. Another example is you can use the short blocks (19S ,4S ) when you are going to shorter formations like an M or B.
One question the team needs to consider is whether it’s a slot switcher. If it is, you’ll have to make sure the team is confident with the rest of the dive in their B slot. In some cases, the team can use it to get out a slot switcher. 19S and 4S are the two main examples of slot switcher blocks.
Here’s a few general suggestions to help determine when to use them.
- Make sure the team is confident with the alternate engineering even if it requires more walking or creeping. If the team isn’t confident or there are still brain locks, don’t take the alternate engineering.
- Typically, try to only have 1 alternate random or block per dive.
- What you are coming from and going to should be taken into consideration.
- Take it if it’s laying there. An easy example is 18 to C. There is an C18 that we can take because it’s laying there.
- If there are multiple engineering options, usually you’ll prioritize the earlier option because getting the extra point can happen earlier in the dive.
- Lastly, pushing the pace is not necessary. We always want to push the pace but with alternate engineering, you gain more points due to the engineering itself being faster and not from pushing the pace faster.
Alternate engineering can be a valuable tool for skydiving teams to increase their score by transitioning between points more quickly and efficiently. However, it is important to prioritize training and familiarity with the alternate formations, as they can have subtle nuances that can throw off team members if they are not prepared. The naming convention can provide clues as to when to use alternate engineering, but experience and judgment are also necessary. The team should only take alternate engineering if they are confident with it. By following these guidelines, skydiving teams can successfully incorporate alternate engineering into their dives and increase their chances of a higher score. As always, talk to a coach!
The diagrams for the alternate engineering and more can be found on website: https://rhythmskydiving.com/formation-diagrams/

