Ultimate Guide to Not Going Low – Part 1: Slow Fall
Thursday, April 25, 2019
- Christy Frikken
- 4/25/19
- 0
- Basic Flying Skills, Big Ways
Going low sucks! Every skydiver of some experience has had that combination of panic and dread as they are looking upwards at an all-but-one completed formation. This guide takes you through the steps to avoid that sinking feeling. We start off talking about slow fall, move on to the stadium, discuss tools for aligning your range, and finish with recovery. Be sure to grab the bonus tunnel drill guide for skills you practice in a tunnel!
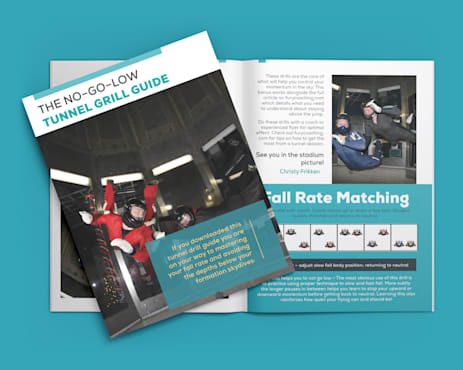
Bonus No-Go-Low Tunnel Drill Guide
A problem with several causes
Students approach me regularly with the request to work on slow fall, hoping that will solve their problem of going low. The truth is that physical fall rate is only one possible cause. In fact, I often deal with very light people who are baffled that they are sinking out!
Going low is caused by a combination of not stopping soon enough, not looking through the formation, lack of general range, and inappropriate selection of tools. You need to address all of these areas to low-proof your skydives!
Mark Brown of the Perris Organizers has a great list of reasons at section 25.5 of his excellent big way article.
The physical act of slow fall
The most obvious way to not go under the formation is physically falling more slowly. Aside from adjusting your suit or body type (both discussed later!) we can physically manipulate our body in a way to fall faster or slower. And since this article is about not going low, we are going to skip all the bits on how to fall faster for another day.
For another excellent video of slow fall, check out Rhythm’s tunnel video!
Creating surface area
I’m going to discuss the absolute slowest a person can fall before I talk about more minor adjustments.
Slowing down is entirely about surface area. The flatter the surface you can present to the wind, the slower you will go. The smaller the profile, the faster you will fall.
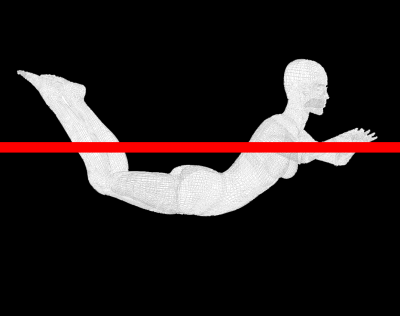
The slowest option, crudely drawn, looks something like this:
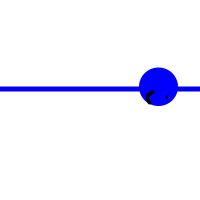
When you have the brakes on the whole way like this, there is a line through your arms torso and legs. This line is perpendicular to the wind. That falls slowly!
For the geeks in the class, that picture isn’t quite right—there is too much leg extension in proportion to arms. It is the slowest option, but not the slowest option without moving around.

Mid-section
If you are in an arched position, your hips and mid-section need to go up to meet that magic line. This is called de-arching, the opposite of arching… or is it? (evil music!)
When you press your arch up to this line it works great. When you go PAST this line, it STOPS working. A correct de-arch is flatness, not putting your bum into the air. If you go past the line your surface area drops and you FALL FASTER. Tears may follow.
If you are super bendy, the distance your hips will move up to that line is greater than if you are a normal person with a mere mortal’s arch. Once you are flat, that is all the slow you can get—going further doesn’t help.
Arms
For maximum effect, your arms should jut straight out perpendicular to the wind. They should tense a little too, just enough to add some pressure. Personally, I think you get a little bit more from your slow fall if you keep your arms closer together, although this probably isn’t the biggest difference for most people.
The most common slow fall problem I see is people pressing out and down, past perpendicular. It seems almost natural to try to “push up” on the wind like you would lift yourself on the ground. Unfortunately, that produces less surface area, which makes you fall faster. (It also adds some forward drive, which isn’t going to help anything!)
Head
Your head has a huge effect on your fall rate! Looking down and pushing your head onto the slow fall line of your torso makes a huge change. Get used to really pressing your head downwards. Most people stop short of maximum surface area here.
Look down to go up, look up to go down!
A few of you are shouting “You need to put your head to the side like on a pillow or you can’t see the formation, goofy coach!” You aren’t wrong—that is super important, and we will discuss that in the going low recovery section. HOWEVER, that is only if you have already GONE LOW! If you are approaching a formation, it is going to be underneath you, so pushing your head down is convenient and works like a charm!
Lower body
For optimum slow fall rate, we need to get those legs extended—but not all the way. Your legs are bigger than your arms, so pushing your legs out fully straight will zoom you forward. That is fantastic for a track, not so much for in-place formation work.
We want our legs to be as much out as we can balance with our upper body. This is most of what you need to do.
If you want to get that tiny bit extra, you can widen your knees and flare them out in a way that allows your thighs and booties to catch a bit more drag.

A proportional response
Previously we talked about the absolute slowest you can go. This is the big brakes. This is the stopping a dive, recovery, or full measure to stay with a formation position. This isn’t the correction you make if you are correcting a couple of inches. These adjustments will be much smaller and use just a little of the big surface area.
Anything that gets you surface area will slow you down, so a tiny bit of flared elbows, flattened chest, de-arch, or knee widening will slow you down just enough to keep you on level. No need to bring a gun to a knife fight.
Myths and troubleshooting
The first step is to be sure your slow fall position is causing you to go low. There are many ingredients in that go-low soup, so use the full guide to make sure this is the best place for you to focus.
Pushing downwards
Probably the most common issue I see is the arms being pressed downwards instead of straight outwards. Jumpers are particularly prone to this when they end up close to a formation and a foot or so low. Also check that you are not looking up with your whole head, just your eyes.
De-arching too much or “hugging the beach ball”
A long time ago, some jumper developed a terrible analogy for de-arching. They told another jumper to “hug a beach ball” with their stomachs to slow fall. This image incorrectly encourages people to put their butts up past the optimal line—by a lot.
After years and years of fixing this issue for people in my early career, I am thrilled to report I don’t hear it much any more from flyers. I think we have squashed the problem!
When you de-arch, it is only until your body is perpendicular to the line; past that line makes you fall faster!

Rocking, zooming, moving forward or backwards
I am lumping these problems into one. Rocking and pitching, zooming around the formation, and moving forwards or backwards as you slow fall have the same root cause.
Your arms and legs need to be continuously in balance. If one side gets ahead of the other it will create pitch, which creates an unwanted drive. If you fail to rectify the problem and basically hold the uneven position, you will zoom around the sky.
Conclusion
Learning to slow fall well isn’t the only cause of going low, but it is one significant component. Remember, it is all about creating surface area and presenting that perpendicular line to the wind. Any motion that does that will move you in the right direction!
Want to practice slow fall with Christy Frikken in the tunnel? Check out the times below, or ask for a custom time!
Tags: fallrate