Ultimate Guide to Not Going Low – Part 2: Stadium
Thursday, April 25, 2019

- Christy Frikken
- 4/25/19
- 0
- Big Ways
Going low sucks! Every skydiver of some experience has had that combination of panic and dread as they are looking upwards at an all-but-one completed formation. This guide takes you through the steps to avoid that sinking feeling. We start off talking about slow fall, move on to the stadium, discuss tools for aligning your range, and finish with recovery. Be sure to grab the bonus tunnel drill guide for skills you practice in a tunnel!
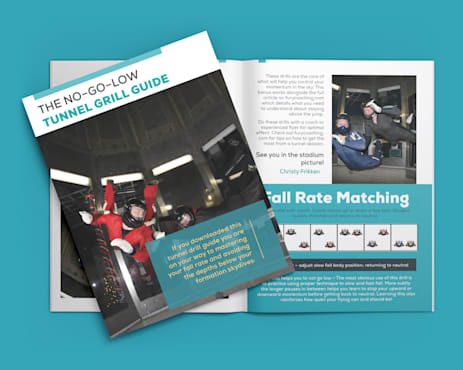
Bonus No-Go-Low Tunnel Drill Guide
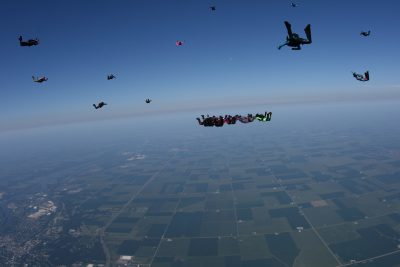
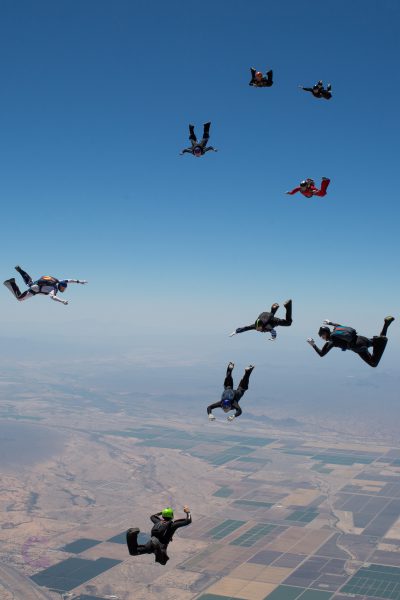
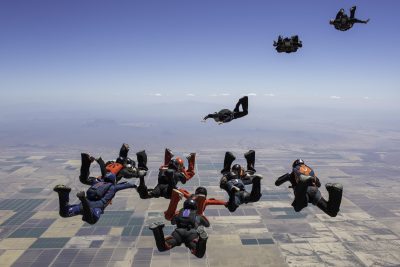
Stadium Picture
Learning to fall slower and choosing the right tools will give you a big advantage in the “staying up” game. But the biggest reason people go low is not matching the fall rate of the targeted formation soon enough.
The best part is there is a cure for this issue! Embracing it will set you free. But first I have to explain a bit more about the cause.
Start, coast, stop—momentum
When you were on AFF, your instructor most certainly taught you to stop a turn with counter rotation—or going back the opposite way before returning to neutral. If you were lucky, a coach introduced you to an old but excellent formula called “start, coast, stop,” which applies to all skydiving motion.
The air doesn’t have a lot of resistance. So, if you start a turn or a forward motion and just get neutral, you are going to keep rolling that way for quite some time. If you want to go somewhere and stop on purpose, you must make the opposite motion before you relax.
It isn’t as obvious, but the same applies to fall rate. If you are diving towards a group, you are building up a ton of speed. If you get to neutral, you are going to keep rocketing at the higher rate for way longer than you would expect. You must slow fall to arrest the downward momentum.
This is apparent in a wind tunnel. Head up in the column of air. Crank an arch and get falling fast. If you just got to neutral, you are going to cheese grater yourself onto the net. You will see very concretely the need to hit the brakes!
Bonus No-Go-Low Tunnel Drill Guide
In the sky, “the net” is the formation. If you don’t hit the brakes soon enough and hard enough, you are going to whizz right by it.
Stadium picture, or buffer zone
Learning how long it takes you to stop is one obvious component to avoid this trap. But even better is to learn that miracle cure I promised.
In the big way world, the term is “stadium picture.” This refers to an intentional stopping place above and away from the formation. When done correctly with lots of people, it looks like fans filling the seats of a stadium.
The stadium picture really helps organize and control a large formation build. But for our “don’t go low anymore” purpose, it works as a buffer zone for any size formation you are approaching.
To execute this, pick a spot 20 feet out and 45 degrees up from your destination. Commit this spot in your mind as being your first stop. Literally STOP THERE. Do everything you can to hit the brakes and pause there for a second or five. Once you are completely parked, gently proceed to your slot at a comfortable pace (like a relaxed walk).
If you match your fall rate to the target at our magic spot, you can comfortably approach without blowing past it. And here is the magic—if you fail to stop here despite your best effort, you have a little buffer before you are in the sadness zone. You can keep cranking out that slow fall and still not be under your friends!
Looking and reacting
If you truly commit to a buffer zone, it has the bonus effect of giving you space and breathing room to LOOK across the formation. Coaches hammer on looking for good reason: it works wonders!
The most common analogy for looking towards the other side of a formation is driving. If you look ahead only at the brake lights of the car right in front of you, you are going to be surprised—and maybe too late. If you look beyond that car, along the road, you will see the chain of slowing vehicles and have no problem making an adjustment.
In order to see the fall rate, look across. If you are not worried about your slot until you are really stopped in the stadium picture, this is easier to do! You aren’t thinking about getting your grip right now anyway, so no need to look there.
The final piece of this fall rate puzzle is to react appropriately to the fall rate. On a lot of videos, you will see jumpers slipping past the stadium picture in a medium-slow fall rate body position. They keep slipping until it is too late, at which point they crank out their Sunday-best tunnel slow fall. If you are looking through the formation, you are much likelier to dig in sooner, thus saving you from the bog of eternal low below. But I still need to tell you just in case: If you see you are sliding through your buffer, HIT THOSE BRAKES!
The burble situation, or getting taken out
Sometimes through no fault of their own, innocent skydivers are taken out. Most of the time these minor hits are just little bumps and nothing serious. Of course, big hits are dangerous, and if these happen, they should be treated as a serious safety issue.
Otherwise we need to deal with the consequences. Your first defense is to react quickly! Here is where lots of tunnel work comes into play, since you can eventually teach your body to grab air without needing to send the order. If you can get to that point, it is nice.
If that isn’t where you are at right now, react as soon as you can. If someone goes underneath you, get big! Crack that slow fall position. And if you hit them, hold that slow fall position! Reaching down with your arms drops even more air, hurts the under person even more, and could break your wrist or arm. So get big and hit them in a big X. Then just climb off them and get back to flying.
If someone lands on you, same deal. Get big now! Slow your fall rate and shake them off. Get back to flying.
Good news! If someone hits you on level, you are in a decent position. Think about staying strong and counteracting whatever drive they give. If you are both on level, you should be able to stay on level.
How do you get good at bouncing back from getting taken out? Stability tunnel drills will help you develop muscle memory for all of these situations.
Bonus No-Go-Low Tunnel Drill Guide
If you end up low, you can recover. Jump to the section on recovery to learn how!
Want to try some big ways? Check out P3 Skydiving for introductory camps for beginners and skill-building events for experienced big way enthusiasts.
Tags: fallrate